ReactJS CRUD application using firebase Firestore database, authentication, and hosting
We’ll be developing a simple CRUD application developed using ReactJS and Firebase Firestore Database, firebase email/password auth for authentication, as well as firebase hosting to host the ReactJS app.
What we’ll build:
We’ll be building an online menu service for a restaurant. It’ll have a public side of the app where everyone can see which menu items the restaurant has and then there is an admin portal that requires login and upon login, the admin can add/update the menu.
Since we’ll be deploying this project as well so this is the project you’ll be building in this tutorial:
Prerequisites — Knowledge about Javascript, React framework (because we’ll not cover the very basics), and a bit about how website layout works (like 12 columns layout of bootstrap). Knowing all these will help but as always I’ll try to keep things simple and direct.
DISCLAIMER — There are typos expected and if any code is incomplete or not easy to understand please refer to that file in the Github Repository.
Installations:
You’ll need to install these three:
Next, if you don’t have it already installed the create-react-app install it: npm i create-react-app as we’ll be using this to create the react app.
Setting up the project
Let’s select any restaurant that you like. For me, I’m going to call this app as nandos-menu. So, create a new react app:
npx create-react-app nandos-menuOpen the project in VSCode. We’ll install the required packages that we’ll be using to build this app. We’ll need react-router-dom to navigate from one page to another, next we’ll use react-bootstrap, bootstrap to design our front end, and firebase for data storage and hosting later on. So, go ahead and install these 4 packages below:
npm i firebase@8.10.0
npm i react-router-dom
npm i react-bootstrap bootstrap@5.1.3
NOTE: There is the latest version v9.x of firebase that's been released as well, you can find it all here: https://firebase.google.com/support/release-notes/js which has a bit of a different syntax for firebase especially import statements. I’ll be updating this tutorial soon but the concept/logic is the same.

The from the src folder delete everything except for index.js and index.css and replace everything inside the index.js file with the code below for now:
import React from 'react';import ReactDOM from 'react-dom';import './index.css';import 'bootstrap/dist/css/bootstrap.css';
ReactDOM.render(<React.StrictMode><h1>App Coming soon</h1></React.StrictMode>,document.getElementById('root'));
Inside the src folder create three new folders named components, pages, and utils.
In pages folder create a new file named Menu.js and add the code below in it:
import React from 'react';import { Table } from 'react-bootstrap';function Menu(props) {return (<div><Table striped bordered hover variant="dark"><thead><tr><th>#</th><th>Item Name</th><th>Category</th><th>Price (USD)</th></tr></thead><tbody><tr><td>1</td><td>Cheessy Garlic Pita</td><td>Starters & Snacks</td><td>4</td></tr><tr><td>2</td><td>Hummus with PERi-PERi Drizzle & Pita</td><td>Starters & Snacks</td><td>5.5</td></tr></tbody></Table></div>);}export default Menu;
Then in index.js replace the line <h1>App Coming soon</h1> with the line below:
import Menu from './pages/Menu';//... All other code
<Menu />
If you run the project npm start it’ll open localhost:3000 you’ll see a dark-themed table.
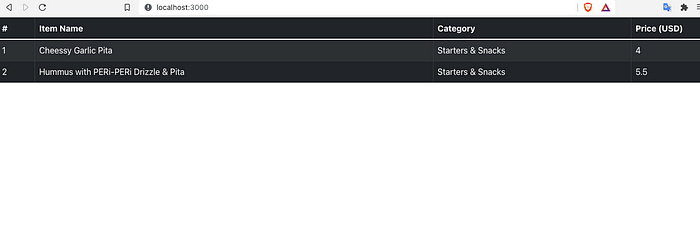
Here we’ve just used a react-bootstrap component to create a table. It’s full width and now we’ll make some changes in the Menu.js file to make it look better than before. So, replace the following code within retirn (...) in Menu.js
import React from 'react';import { Table, Card, Image, Button, } from 'react-bootstrap';function Menu(props) {return (<><Card style={{ margin: 24 }}><Card.Header className="d-flex justify-content-between align-items-center"><div className="align-items-center" style={{ marginRight: 8 }}><Image src={'https://upload.wikimedia.org/wikipedia/en/thumb/c/c5/Nandos_logo.svg/1200px-Nandos_logo.svg.png'} style={{ width: 150 }} /><p style={{ marginTop: 8, fontSize: 12, color: '#A1A1A1' }}>LG-47, 76 & 76A, Berjaya Times Square, 1, Jalan Imbi, Imbi, 55100 Kuala Lumpur, Wilayah Persekutuan Kuala Lumpur</p></div><Button style={{ backgroundColor: '#BD2B2B', borderWidth: 0, }}>Place Order</Button></Card.Header><Card.Body><Table responsive><thead><tr><th>#</th><th>Item Name</th><th>Category</th><th>Price (USD)</th></tr></thead><tbody><tr><td>1</td><td>Cheessy Garlic Pita</td><td>Starters & Snacks</td><td>4</td></tr><tr><td>2</td><td>Hummus with PERi-PERi Drizzle & Pita</td><td>Starters & Snacks</td><td>5.5</td></tr></tbody></Table></Card.Body><Card.Footer className="d-flex justify-content-between align-items-center"><p style={{ marginTop: 8, fontSize: 12, color: '#A1A1A1' }}>© 2022 Nandos</p><p style={{ marginTop: 8, fontSize: 12, color: '#A1A1A1' }}><a href="#">Admin Login</a> • <a href="#">Privacy Policy</a> • <a href="#">Directions</a> • <a href="#">Contact Us</a></p></Card.Footer></Card></>);}export default Menu;
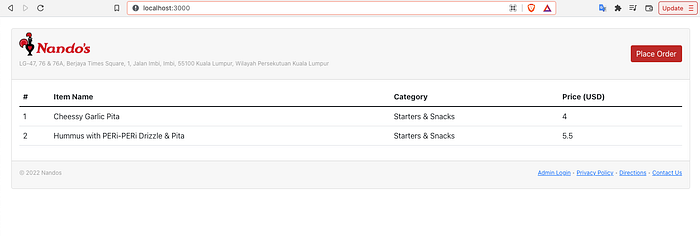
Take a moment and see what we have added to the code. First, we have used a Card component that works as a container that is containing all these elements. We’ve given it some in-line styling of a margin of 24 pixels from all sides. Then the Card has three sub-components i.e. Header, Body, and Footer. In Card.Header we’ve added an Image and Button component from react-bootstrap and we also have a <p> tag which is an HTML-based tag. You see how we can mix and match react and HTML together to create layouts. Card.Header has been given the className as d-flex justify-content-between align-items-center which is handling some of the styling properties like keeping child components in one row and having space between the contents. In Card.Body we have the same table as before but without a dark theme, borders, and hover effects. Then in Card.Footer we have some links which we’ll see later. Notice that I’ve added the styling in-line you can add the styles in index.css then import the file and give them as className to any component.
Now, that the design is set the next thing we’ll need is to create more pages like Login, Admin dashboard, add/edit forms for menu, etc.
Let’s create a simple login page. Create Login.js file inside pages and add the following code in it:
import React, { useState } from 'react';import { Card, Form, Button, Image } from 'react-bootstrap';function Login(props) {const [validate, setValidated] = useState(false);const LoginButtonPressed = (e) => {alert("Login button pressed")}return (<><Card style={{ margin: 24, }}><Card.Header><Image src={'https://upload.wikimedia.org/wikipedia/en/thumb/c/c5/Nandos_logo.svg/1200px-Nandos_logo.svg.png'} style={{ width: 80, marginBottom: 8 }} /><h4>Admin Login</h4><p style={{ marginTop: 8, fontSize: 12, color: '#A1A1A1' }}>If you're an admin of Nandos please login below. If you don't have an account please contact your administrator to get a login.</p></Card.Header><Card.Body><Form noValiate validated={validate} onSubmit={LoginButtonPressed}><Form.Group className='mb-3' controlId='email'><Form.Label>Email</Form.Label><Form.Control type="email" placeholder='Enter admin email' size='md' /><Form.Control.Feedback type='invalid'>Email is required.</Form.Control.Feedback></Form.Group><Form.Group className='mb-3' controlId='password'><Form.Label>Password</Form.Label><Form.Control type="password" placeholder='Enter password' size='md' /><Form.Control.Feedback type='invalid'>Password is required.</Form.Control.Feedback></Form.Group><Button variant='primary' type='submit' size='md' style={{ fontWeight: 'bold' }}>Login ❯</Button></Form></Card.Body><Card.Footer><a href="/" style={{ marginTop: 8, fontSize: 12, }}>← Back to homepage</a></Card.Footer></Card></>);}export default Login;
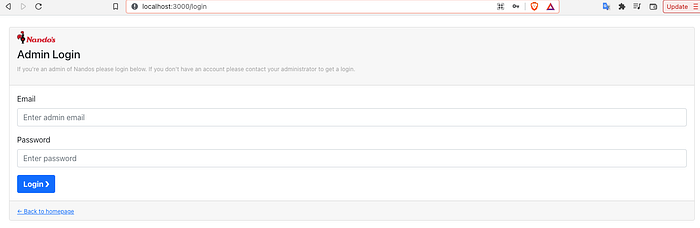
In the code above, we have created a simple login form inside a Card component. Same as before we have some information in the Card.Header. A new react-bootstrap component we’ve used is Forms and we have two Form.Group child components inside of it. The controlId is a unique id associated with each field and you’ll see its use shortly when we’ll handle form submit events. Each Form.Group contains Form.Label which is the field label, then Form.Control is the main control that will be a text field (there are many other types as well), then we have a Form.Control.Feedback which will show a message when a form is submitted without valid values. We have used a useState to manage the validated state of the form and finally, we have a button that is of type='submit' which will trigger onSubmit={LoginButtonPressed} that we have mentioned in the <Form> and for now, it’ll just show an alert. In Card.Footer we have a link that links back to the home page.
Right now we have two pages but we don’t have the way to navigate to the pages. To make it happen we’ll need to make changes to Menu.js as well as index.js.
In Menu.js for the the <a href="#">Admin Login</a> and change it’s href to:
<a href="/login">Admin Login</a>So we have linked the Login page i.e. /login with our home page i.e. Menu.js and on Login.js we have a link i.e. / that basically means to go back to the home page. We need to attach these links to the related components. So open index.js and replace everything inside ReactDOM.render(... with:
//... other import
import { BrowserRouter, Routes, Route } from "react-router-dom";import Menu from './pages/Menu';
import Login from './pages/Login';ReactDOM.render(<BrowserRouter>
  <Routes>
    <Route exact path="/" element={<Menu />} />
    <Route exact path="/login" element={<Login />} />
  </Routes>
</BrowserRouter>,document.getElementById('root'));
Using the package react-router-dom we imported BrowserRouter, Routes, Route. Then we have two Route and see how we have provided the same routes as we described in Menu.js and Login.js. When we’ll have a new page we’ll add a new Route inside Routes.
Please see the Possible errors section at the end if you’re facing any errors up to this point.
If you run the app and click on the Admin Login link you’ll be redirected to Login.js and from the Login screen you can go back to the home page by clicking on ← Back to homepage:
We’ll finish the design part first and later we’ll connect everything with Firebase Firestore. We’ll create the Admin Dashboard next so create a file inside pages folder named Dashboard.js and add the following code in it:
import React from 'react';import { Table, Card, Image, Button, } from 'react-bootstrap';function Dashboard(props) {return (<><Card style={{ margin: 24 }}><Card.Header className="d-flex justify-content-between align-items-center"><div className="align-items-center" style={{ marginRight: 8 }}><Image src={'https://upload.wikimedia.org/wikipedia/en/thumb/c/c5/Nandos_logo.svg/1200px-Nandos_logo.svg.png'} style={{ width: 80 }} /><h4 style={{ marginTop: 8, }}>Dashboard</h4></div><Button style={{ backgroundColor: '#000', borderWidth: 0, }}>Add New Item</Button></Card.Header><Card.Body><Table responsive><thead><tr><th>#</th><th>Item Name</th><th>Category</th><th>Price (USD)</th><th></th></tr></thead><tbody><tr><td>1</td><td>Cheessy Garlic Pita</td><td>Starters & Snacks</td><td>4</td><td><Button variant='primary'>✎ Edit</Button>{' '}<Button variant='danger'>x Delete</Button></td></tr><tr><td>2</td><td>Hummus with PERi-PERi Drizzle & Pita</td><td>Starters & Snacks</td><td>5.5</td><td><Button variant='primary'>✎ Edit</Button>{' '}<Button variant='danger'>x Delete</Button></td></tr></tbody></Table></Card.Body><Card.Footer className="d-flex justify-content-between align-items-center"><p style={{ marginTop: 8, fontSize: 12, color: '#A1A1A1' }}>Nandos Menu v1.0.0 - <a href="/login">Logout</a></p></Card.Footer></Card></>);}export default Dashboard;
On Dashboard.js we have the similar structure as Menu.js but this time with some admin controls like the main button has been changed to Add New Item and Edit/Delete buttons are added to each table field.
Next we’ll see what will happen when Add/Edit or Delete is pressed? To handle that we’ll not need a new page but instead we’ll show a popup form, which in React-Bootstrap terminology (just like in many other front-end languages) is called Modal.
There will be one form for Add and Edit functionality. We’ll just fill the fields if it’s an edit request and vice versa. So go ahead and add the code below to the Dashboard.js class:
import React, { useState } from 'react';import { Table, Card, Image, Button, Modal, Form, FloatingLabel } from 'react-bootstrap';function Dashboard(props) {const [showAddEditForm, setShowAddEditForm] = useState(false);
const [addEditFormType, setAddEditFormType] = useState('Add'); //Add, Edit
const [validated, setValidated] = useState(false);const handleModalClose = () => {
setShowAddEditForm(false);
}const handleAddEditFormSubmit = (e) => {
alert("Functionality Coming Soon");
}return (<>{/* Add/Edit Form START */}<Modal show={showAddEditForm} onHide={handleModalClose}><Form noValidate validated={validated} onSubmit={handleAddEditFormSubmit}><Modal.Header><Modal.Title>{(addEditFormType === 'Add') ? 'Add Menu Item' : 'Edit'}</Modal.Title></Modal.Header><Modal.Body><FloatingLabel controlId="itemName" label="Item Name" className="mb-3" ><Form.Control required type='text' placeholder='Enter item name' size='md' /><Form.Control.Feedback type='invalid'>Item name is required</Form.Control.Feedback></FloatingLabel><FloatingLabel controlId="itemCategory" label="Item Category" className="mb-3" ><Form.Select><option value="0">Starters & Snacks</option><option value="1">Salads</option><option value="2">Peri-Peri Chicken</option><option value="3">Sharing Platters</option></Form.Select></FloatingLabel><FloatingLabel controlId="itemPrice" label="Price" className="mb-3" ><Form.Control required type='text' placeholder='Enter item price' size='md' /><Form.Control.Feedback type='invalid'>Item Price is required</Form.Control.Feedback></FloatingLabel></Modal.Body><Modal.Footer><Button type="submit">{(addEditFormType === 'Add') ? 'Add' : 'Update'}</Button></Modal.Footer></Form></Modal>{/* Add/Edit Form END */}{/* ...No change in the code below <Card... */}
In the code above we have imported useState hook. Then I have imported a new react-bootstrap component called FloatingLabel which is provides a different feel to the FormControl elements you’ll see when you render that it’ll be a bit different than the Login form. Then I have created variables that’ll handle the show/hide of the form and addEditFormType will be responsible to render the form accordingly for Add or Edit case. The handleModalClose will simply hide the form and upon submission of the form, the handleAddEditFormSubmit will be called. The for the UI you can place them <Modal…</Modal> anywhere in the code since it’ll not affect the rest of the UI when it’s displayed. The showing of the Modal is handled by show and inside Modal we have a form and that form is then rendering the Modal.Header, Modal.Body, and Modal.Footer. It’s very similar to a card. Notice how we haven’t used Form.Group this time but instead, we used FloatingLabel which has similar props like controlId. It doesn’t matter as it’ll just provide a different UI feel than Form.Group. Also the addEditFormType state is used to render the label and button title on the form. We’ll pre-populate the fields in case of edit and that code we’ll add later. Finally, a new form control is used as well and that is Form.Select which is a dropdown.
Before diving into firebase one last piece of UI that we need is a confirmation dialogue when delete is clicked. To do that add the Modal code below in Dashboard.js anywhere:
//... Same import and other code as before
const [showDeleteDialogue, setShowDeleteDialogue] = useState(false);const handleModalClose = () => {
//... Other code lines
setShowDeleteDialogue(false);
}const handleMenuItemDelete = (e) => {
alert("Delete Functionality Coming Soon");
}//...Other code above
            {/* Delete Confirmation Dialogue START */}<Modal show={showDeleteDialogue} onHide={handleModalClose}><Modal.Header closeButton><Modal.Title>Delete Menu Item</Modal.Title></Modal.Header><Modal.Body><p>Are you sure you want to delete this menu item?</p></Modal.Body><Modal.Footer><Button variant="secondary" onClick={handleModalClose}>Cancel</Button><Button variant="danger" onClick={handleMenuItemDelete}>Yes, Delete</Button></Modal.Footer></Modal>{/* Delete Confirmation Dialogue END */}//...Other Code below
In the code above we’ve created a new state to hide/show delete dialogue and use the same handleModalClose to hide the delete form as well. Then same as before we have implemented the delete Modal.
That’s all for the UI part, we’ll be making small changes as we’re going to implement the backend now. We’ll set up a firebase firestore and perform CRUD functionality.
Implementing Firebase Firestore
This will have two modes. First would be a public side i.e. Menu.js which everyone can see and an authenticated side i.e. Dashboard.js which will be used only when a person is authenticated. Well use firebase auth for that but for now, let’s finish the public side of things.
We’ll be performing only the Read functionality for the public side so go ahead and login/create an account and create a new project and you should see something similar to the image below if you’re o the Firebase console: console.firebase.google.com
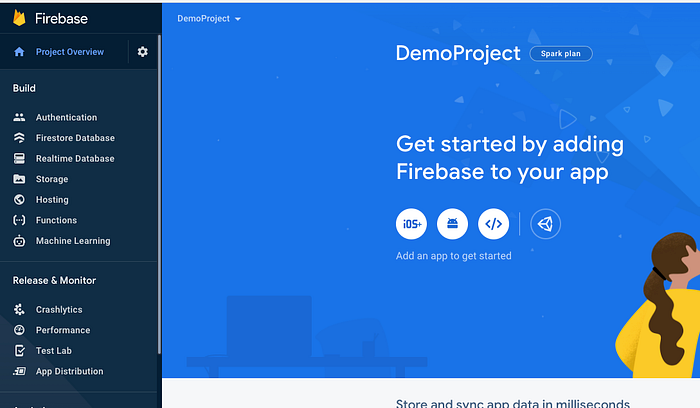
Choose Web from where it says Add an app to get started.


Give your app a name in my case I’ve named it Nandos Menu and Click on the Register app button when done. In the second step only copy the const firebaseConfig....}; and go to VSCode and create a new file in utils folder and name it firestore.js and add the following code in it:
import firebase from 'firebase/compat/app';
import 'firebase/compat/firestore';const firebaseConfig = {
   apiKey: "YOUR_API_KEY",
   authDomain: "YOUR_API_KEY",
   databaseURL: "YOUR_API_KEY",
   projectId: "YOUR_API_KEY",
   storageBucket: "YOUR_API_KEY",
   messagingSenderId: "YOUR_API_KEY",
   appId: "YOUR_API_KEY",
   measurementId: "YOUR_API_KEY"
};// Initialize Firebase
const firebaseApp = firebase.initializeApp(firebaseConfig);
const db = firebaseApp.firestore();
export { db };
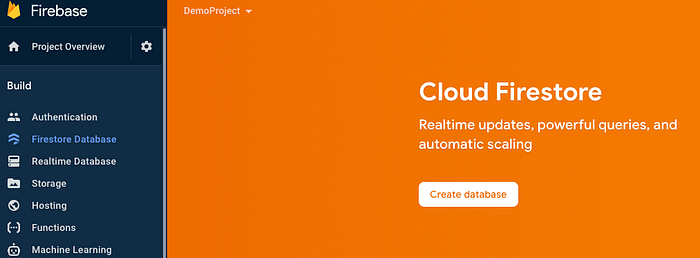
We’ll come back to VSCode later. For now, let’s go back to Firebase Console and this time select Firestore Database and click on Create database.
Keep Start in production mode select and click Next. Select any. server location and click on Enable and it’ll enable firestore in your project.


Click on Start Collection and name the collection as MenuItems and then it’ll ask you to add a document. Add three fields in the document i.e. itemName, itemPrice, and itemCategory. The Type of itemPrice would be number and the rest would be string. You’ll need to click on Auto-ID to give this document a unique ID. After all, is done click Save.


You’ll see one entry in MenuItem category and this is where all the menu items are going to be. Add as many menu items as you want, I’ll add another one and that’ll be it as later we’ll be adding more from the Add new menu item form.

This collection works both ways. For the public, it’ll allow Read-only properties and for Authenticated the same collection will allow read and write. To do that switch to the Rules tab in firestore and update the code in it with the code given below and click on Publish when done.
rules_version = '2';
service cloud.firestore {
  match /databases/{database}/documents {
    match /{document=**} {
      allow read, write: if request.auth != null;
      allow read;
    }
  }
}

The rules above will ensure that a user is authenticated if any collection in the firestore database is supposed to be modified.
Next up we’ll read the data from MenuItems collection and display it in our React app.
Fetching the data from Firestore
Open the project in VSCode and we have a firestore.js file that we created earlier we’ll use it to send requests to firestore.
Create a new folder name services inside utils folder and in it create a file named FirestoreService.js and add the following code in it:
import { db } from '../firestore'function getAllMenuItems() {   return new Promise((resolve, reject) => {
      db.collection("MenuItems").get().then((allMenuItems) => {
           resolve(allMenuItems);
      }).catch((e) => {
           reject(e);
      })
   })
}export default { getAllMenuItems }
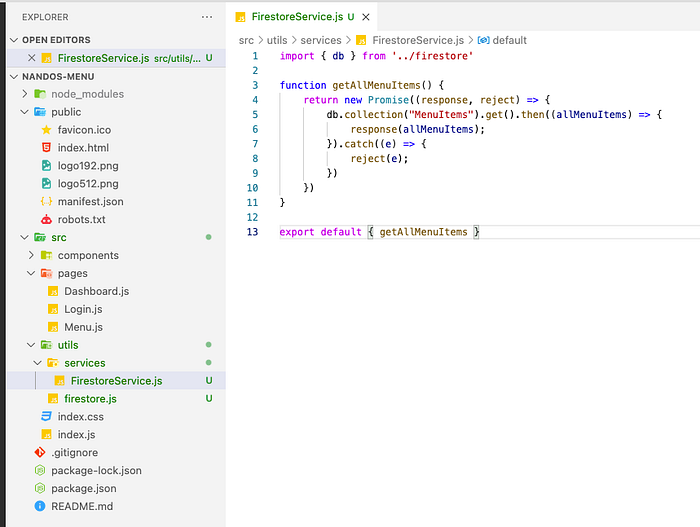
In the code above we’ve written a small service that’ll fetch all the menu items in the MenuItems collection on Firestore and return them. We’ll use this service to fetch data from Menu.js so go ahead and update Menu.js with the code below:
import React, { useEffect, useState } from 'react';//...Other imports
import FirestoreService from '../utils/services/FirestoreService';function Menu(props) {   const [menuItems, setMenuItems] = useState([]);   useEffect(() => {
      FirestoreService.getAllMenuItems().then((response) => {
          setMenuItems(response._delegate._snapshot.docChanges);
      }).catch((e) => {
          alert("Error occured while fetching the menu item. " + e);
      })
   }, [])//Other return (... and UI elements <Card.Body><Table responsive><thead><tr><th>#</th><th>Item Name</th><th>Category</th><th>Price (MYR)</th></tr></thead><tbody>{(menuItems) && (menuItems.map((menuItem, index) => (<tr key={index}>
   <td>{index + 1}</td>
   <td>{menuItem.doc.data.value.mapValue.fields.itemName.stringValue}
   </td>
   <td>{menuItem.doc.data.value.mapValue.fields.itemCategory.stringValue
   </td>
   <td>{menuItem.doc.data.value.mapValue.fields.itemPrice.doubleValue}
   </td>
</tr>)))}</tbody>
</Table>//... all other code below is the same
In the above code, we first imported two hooks i.e. useEffect, and useState. Then we imported the service we wrote FirestoreService. After that, we have a state which gets initialized with an empty array. Then in useEffect we send the fetch request to firestore and if the data is retrieved we’re updating the state setMenuItems with the changes. If you console.log the response here, you’ll see it has a lot of information but we’re only extracting what we need here. The in the UI we have updated the table body with values we have fetched. We used a .map to loop through the array we got from firestore and display the value. If you run your project now it should show the two values I added manually when I created the firestore instance.
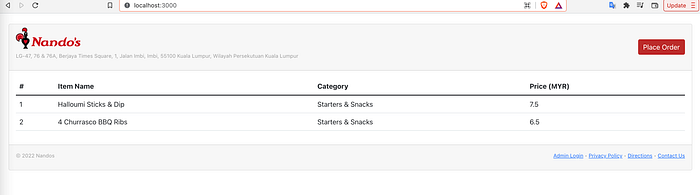
So, we have successfully fetched the values of firestore. Please see the possible errors section at the end if you’re facing any errors.
The next set of operations is to add/edit or delete the menu items and that require authenticated access. So, let's set that up first.
Authentication
Open console.firebase.com and go to the Authentication → Sign-in method. Select Email/Password and turn the switch on to enable it and Save.


Select the Users tab and click on Add User. Add an email and password (I did Email: demo@nandosmenu.io & Password: Demo.1234) and click Add User. We’ll only keep one email to log in and we’re not going to have signup functionality.


Now, that we have a user that we’ll use as an authenticated user to perform write operations on the firestore database.
Now we’ll need to make changes in Login.js as well as Dashboard.js. The dashboard should only be accessible when the user is authenticated but right now if you open http://localhost:3000/dashboard you can see it rendering. We’ll stop this first and then implement authentication in Login.js so open Dashboard.js and make the modifications as instructed in the code snippet below:
Then open index.js and in it add://... other routes
<Route path="*" element={<Navigate replace to="/login" />} />//... </Routes
In Dashboard.js we simply call in firebase.auth() and check if the user is logged in or not and based on that we’re updating a state. Then using that state we’re redirecting users if they are not logged in. Then in index.js we added a route that’ll redirect any Navigate to /login. It’s a hack, there are better ways to handle this but for now, go with it.
Now, we’ll implement the auth. So open Login.js and remove all the code and copy the entire thing from below to replace:
import React, { useState } from 'react';
import { Card, Form, Button, Image } from 'react-bootstrap';import firebase from 'firebase/compat/app';
import 'firebase/compat/auth';function Login(props) {const [validate, setValidated] = useState(false);
const [user, setUser] = useState(null);//Checking if user is logged in.
firebase.auth().onAuthStateChanged((u) => {
if (u) {
  setUser(u)
} else {
  setUser(null);
}
});const LoginButtonPressed = (e) => {
e.preventDefault();
const { email, password } = e.target.elements;
firebase.auth().signInWithEmailAndPassword(email.value, password.value).then((userCredentails) => {//SignedIn User
var user = userCredentails.user;
alert("Login Successful")
setUser(user);
setValidated(true);}).catch((e) => {alert(e.message);
setValidated(true);})
}const LogoutButtonPressed = () => {firebase.auth().signOut().then(() => {
//Signout Successful
alert("Logout Successful");
setUser(null);
setValidated(false);}).catch((e) => {
alert(e.message);
})
}return (<>{(user === null) && <Card style={{ margin: 24, }}><Card.Header><Image src={'https://upload.wikimedia.org/wikipedia/en/thumb/c/c5/Nandos_logo.svg/1200px-Nandos_logo.svg.png'} style={{ width: 80, marginBottom: 8 }} /><h4>Admin Login</h4><p style={{ marginTop: 8, fontSize: 12, color: '#A1A1A1' }}>If you're an admin of Nandos please login below. If you don't have  an account please contact your administrator to get a login.</p></Card.Header><Card.Body><Form noValidate validated={validate} onSubmit={LoginButtonPressed}><Form.Group className='mb-3' controlId='email'><Form.Label>Email</Form.Label><Form.Control type="email" placeholder='Enter admin email' size='md' /><Form.Control.Feedback type='invalid'>Email is required.</Form.Control.Feedback></Form.Group><Form.Group className='mb-3' controlId='password'><Form.Label>Password</Form.Label><Form.Control type="password" placeholder='Enter password' size='md' /><Form.Control.Feedback type='invalid'>Password is required.</Form.Control.Feedback></Form.Group><Button variant='primary' type='submit' size='md' style={{ fontWeight: 'bold' }}>Login ❯</Button>{/* <p>{user.email}</p> */}</Form></Card.Body><Card.Footer><a href="/" style={{ marginTop: 8, fontSize: 12, }}>← Back to homepage</a></Card.Footer></Card>}{(user !== null) && <div style={{ margin: 24 }}><p>You're loggedin successfully. Go to <a href="/dashboard">dashboard</a></p><p><a onClick={LogoutButtonPressed}>Logout</a></p></div>}</>);}export default Login;
What we did in the code above, we have divided our view into two different divs i.e. one <Card> and the other is <div>. Depending upon what the state user is we are rendering it. The firebase.auth() is used to fetch the user logged-in status. Then we have two press event that is called when a certain button is pressed. Now we need to add a similar approach to the dashboard when the user is not logged in it should render a different view. Let’s create a not logged-in component that we’ll use to render whenever we need to show a not logged-in view.
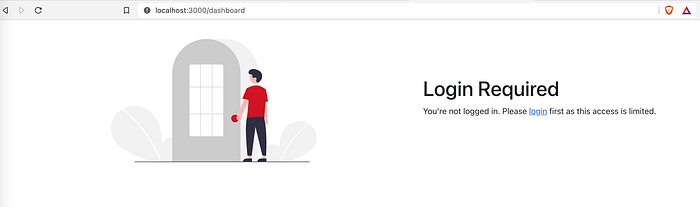
We’ll create a component that we can basically use anywhere. I’ll also demonstrate linking an image that is stored locally. Make a new folder in src name it assets and add any image you want to it. Mine you can find in the public repo of this project. In components folder make a new file name it NoLoggedInView.js and add the following code in it:
import React from 'react';
import { Col, Image, Row, Container } from 'react-bootstrap';
import notLoggedInImage from '../assets/undraw_Login_re_4vu2.png'function NoLoggedInView(props) {return (<><Container><Row className="align-items-center"><Col><Image src={`${notLoggedInImage}`} style={{ width: '80%' }} /></Col><Col><h1>Login Required</h1><p>You're not logged in. Please <a href="/login">login</a> first as this access is limited.</p></Col></Row></Container></>);}export default NoLoggedInView;
This view would be shown when a user is not logged in and navigate to the /dashboard so we have to add the above component in Dashboard.js
//...others
import NotLoggedInView from '../components/NoLoggedInView';//...other thingsconst [user, setUser] = useState(null);firebase.auth().onAuthStateChanged((user) => {if (user) {setUser(user);} else {setUser(null);}})//... othersreturn (<>{/* <h1>You're not logged in. Please <a href="/login">login</a> first then come to dashboard.</h1> */}{(user === null) && <NotLoggedInView />}{(user !== null) && <>//... modal and everything else
In the above code, we use firebase.auth() to fetch the auth state and based on that update user state. Using the user state we then render either the <NotLoggedInView /> or the full dashboard view i.e. Modal, Table etc.
If you run the project now you’ll be able to see this security hack in place. On the dashboard, you won’t be able to access it. Please also note that we haven’t made changes in index.js because we’re handling the security on the page level so just match that your index.js is similar to the code below:
import React from 'react';
import ReactDOM from 'react-dom';import './index.css';
import 'bootstrap/dist/css/bootstrap.css';import { BrowserRouter, Routes, Route } from "react-router-dom";import Menu from './pages/Menu';
import Login from './pages/Login';
import Dashboard from './pages/Dashboard';ReactDOM.render(<BrowserRouter><Routes><Route exact path="/" element={<Menu />} /><Route exact path="/login" element={<Login />} /><Route exact path="/dashboard" element={<Dashboard />} /></Routes></BrowserRouter>,document.getElementById('root'));
You should be able to see this component being rendered if a user is not logged in. Now that we have the auth in control the next thing is to start doing authenticated stuff (pun intended) i.e. write data to firestore.
Open firestore console and add a new Collection named MenuCategories. Inside this collection add an auto-ID document with two fields i.e. catName of string type, and catNumber of number type. Give the values to the fields i.e. Salads and 1. The catNum will come in handy later in the code you’ll see.


Now, go ahead and add all these categories manually. The catName and catNum is give:
0. Starters & Snacks
- Salads
- Peri-Peri Chicken
- Sharing Platters
- Burgers, Wraps & Pitas
- Specialties
- Nandinos
- Sides
- Drinks
- Desserts

So, you have guessed it right. We’re first going to GET these categories and populate our Add/Edit form to have only these categories. We’re not going to cover edit or delete a category implementation as it’s not needed for this scope. We’ll first need to make a service for fetching all the categories so add the following function in FirestoreService.js file:
//... other codefunction getAllMenuCategories() {return new Promise((resolve, reject) => {db.collection("MenuCategories").get().then((allMenuCategories) => {resolve(allMenuCategories);}).catch((e) => {reject(e);})})}export default { getAllMenuItems, getAllMenuCategories }
Similar to the function above it we have created another get request to our categories collection. Now we’ll make changes in the Dashboard.js:
import React, { useState, useEffect } from 'react';//...const [menuItems, setMenuItems] = useState([]);
const [menuCategories, setMenuCategories] = useState([]);//...function fetchMenuCategories() {FirestoreService.getAllMenuCategories().then((response) => {
setMenuCategories(response._delegate._snapshot.docChanges);
}).catch((e) => {
alert("Error occured while fetching the menu categories. " + e);
})
}function fetchMenuItems() {FirestoreService.getAllMenuItems().then((response) =>
setMenuItems(response._delegate._snapshot.docChanges);
}).catch((e) => {
alert("Error occured while fetching the menu item. " + e);
})
}useEffect(() => {  if (user !== null) {    if (menuCategories.length <= 0) {
      fetchMenuCategories();
    }  fetchMenuItems();}}, [user])//... UI changes others<FloatingLabel controlId="itemCategory" label="Item Category" className="mb-3" ><Form.Select>{(menuCategories) && (menuCategories.map((menuCategory, index) => (<option key={index} value={menuCategory.doc.data.value.mapValue.fields.catName.stringValue}>{menuCategory.doc.data.value.mapValue.fields.catName.stringValue}</option>)))}</Form.Select></FloatingLabel>//... UI changes others
If you run it, you should see the category drop-down auto-populated.
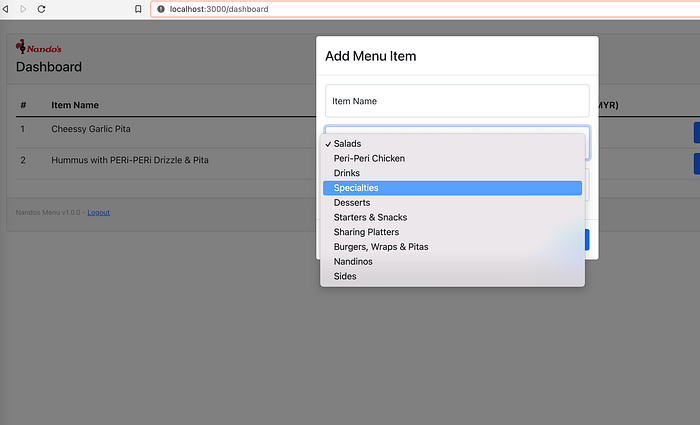
In the code above we created two functions one to fetch categories and another to fetch the items as we also need to display those, the ones we have on the dashboard are hard-coded and we have already taken care of this the Menu.js and we have used the same code here. Then we have used the same technique to fetch values of the categories and using the same method we are lopping through their array and assigning the categories to the drop-down.
Next, since we’ve already got the value of MenuItems so let’s replace the <tbody> code, in the same manner, we did in Menu.js we’ll do it in Dashboard.js
<tbody>{(menuItems) && (menuItems.map((menuItem, index) => (<tr key={index}><td>{index + 1}</td><td>{menuItem.doc.data.value.mapValue.fields.itemName.stringValue}</td><td>{menuItem.doc.data.value.mapValue.fields.itemCategory.stringValue}</td><td>{menuItem.doc.data.value.mapValue.fields.itemPrice.doubleValue ? menuItem.doc.data.value.mapValue.fields.itemPrice.doubleValue : menuItem.doc.data.value.mapValue.fields.itemPrice.integerValue}</td><td><Button variant='primary' onClick={() => {alert("Edit functionality coming soon")}}>✎ Edit</Button>{' '}<Button variant='danger' onClick={() => {alert("Delete functionality coming soon")}}>x Delete</Button></td></tr>)))}</tbody>
It’s all the same except for the edit and delete buttons. We have onClick attached added with each button and we’ll come back to this after we finish the Add New Item functionality. So, the fetch part is finished now.
Now, we’ll implement the Add New Item functionality. There will be many small changes so move with caution. First, we’ll add a service in FirestoreService.js as follows:
//... Other functions
function AddNewMenuItem(itemName, itemCategory, itemPrice) {return new Promise((resolve, reject) => {const data = {
"itemName": itemName,
"itemCategory": itemCategory,
"itemPrice": parseFloat(itemPrice)
}db.collection("MenuItems").add(data).then((docRef) => {
   resolve(docRef);
}).catch((e) => {
   reject(e);
})})}export default { getAllMenuItems, getAllMenuCategories, AddNewMenuItem }
A simple service that add the data into a firebase collection named MenuItems. Now we need to make changes in Dashboard.js
//... other things above
const [currentMenuItem, setCurrentMenuItem] = useState({
"itemName": '',
"itemCategory": '',
"itemPrice": 0
})//Updating the handleAddEditFormSubmitconst handleAddEditFormSubmit = (e) => {
e.preventDefault();
const { itemName, itemCategory, itemPrice } = e.target.elements; if (itemPrice.value && itemName.value) {
if (addEditFormType === "Add") {
FirestoreService.AddNewMenuItem(itemName.value, itemCategory.value, itemPrice.value).then(() => { alert(`${itemName.value} is successfully added to the menu.`)
setCurrentMenuItem({ "itemName": '', "itemCategory": '', "itemPrice": 0 })
handleModalClose();
window.location.reload(false);}).catch((e) => {
alert("Error occured: " + e.message);
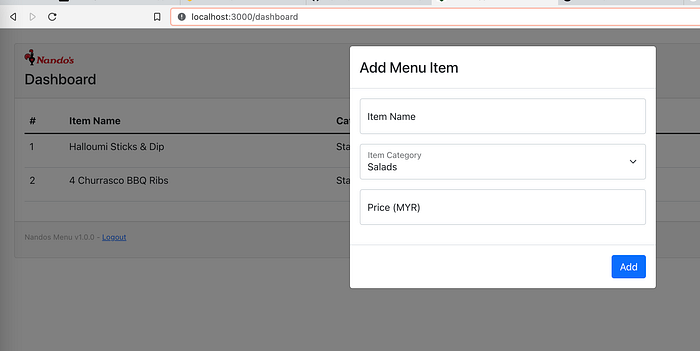
})}}setValidated(true)}//...Oher elements and UI
//We'll need to update Add/Edit Modal Body only<Modal.Body><FloatingLabel controlId="itemName" label="Item Name" className="mb-3" ><Form.Control required type='text' placeholder='Enter item name' size='md' value={currentMenuItem?.itemName} onChange={(e) => {setCurrentMenuItem({
"itemName": (e.target.value) ? e.target.value : '',
"itemCategory": currentMenuItem?.itemCategory,
"itemPrice": currentMenuItem?.itemPrice
})}} /><Form.Control.Feedback type='invalid'>Item name is required</Form.Control.Feedback></FloatingLabel><FloatingLabel controlId="itemCategory" label="Item Category" className="mb-3" ><Form.Select value={currentMenuItem?.itemCategory} onChange={(e) => {setCurrentMenuItem({
"itemName": currentMenuItem?.itemName,
"itemCategory": e.target.value,
"itemPrice": currentMenuItem?.itemPrice
})}}>{(menuCategories) && (menuCategories.map((menuCategory, index) => (<option key={index} value={menuCategory.doc.data.value.mapValue.fields.catName.stringValue}><option key={index} value={menuCategory.doc.data.value.mapValue.fields.catName.stringValue}>{menuCategory.doc.data.value.mapValue.fields.catName.stringValue}</option>
)))}</Form.Select></FloatingLabel><FloatingLabel controlId="itemPrice" label="Price (MYR)" className="mb-3"><Form.Control required type='text' placeholder='Enter item price' size='md' value={currentMenuItem?.itemPrice} onChange={(e) => {setCurrentMenuItem({
"itemName": currentMenuItem?.itemName,
"itemCategory": currentMenuItem?.itemCategory,
"itemPrice": e.target.value)
})}} /><Form.Control.Feedback type='invalid'>Item Price is required</Form.Control.Feedback></FloatingLabel></Modal.Body>//... other UI elements as it is and then we need to update the Add New Item button<Button style={{ backgroundColor: '#000', borderWidth: 0, }} onClick={() => {setShowAddEditForm(true);}}>Add New Item</Button>//... other things
In the code above we created a new state currentMenuItem and initialized it with an object that has some basic initial values. Then we have. updated the handleAddEditFormSubmit in which we have an event e that is giving us the values of itemName, itemCategory, itemPrice which are there because we. have used these names in the controlId for each Form field. That was the use of controlId. This function will make changes as per the type of action selected which in this case is Add. So we are just calling the required service and providing the data. Notice it’s not as direct as calling itemName we need to call itemName.value in order to get its value because there will be some other properties as well. Then upon the successful response, we’re setting the currentMenuItem to the default state and closing. the modal and. finally refreshing the page so that we can get the new values (There are other much-optimized ways to do this without the need of refresh like using Redux etc so explore that if you want). The for the Form Control fields we have added two things i.e. value and onChange and we’re updating the currentMenuItem state and hence we’re getting the latest value for the value property. Finally, make sure you are calling the setShowAddEditForm upon clicking of the Add New Item button. If you run the program now you’ll be able to add to the DB:


We can now successfully add a menu item and I’m going to follow this menu of Nandos to add values. Next, we’ll implement the delete functionality. So let’s add that service in FirebaseService.js:
//Other functions
function UpateMenuItem(menuItemID, itemName, itemCategory, itemPrice) {return new Promise((resolve, reject) => {const data = {
"itemName": itemName,
"itemCategory": itemCategory,
"itemPrice": parseFloat(itemPrice
}db.collection("MenuItems").doc(menuItemID).update(data).then(() => {resolve()}).catch((e) => {reject(e)})})}export default { getAllMenuItems, getAllMenuCategories, AddNewMenuItem, UpateMenuItem }
Similar to the previous function this function takes an additional parameter which is the document id and updates the data in it. Now, open Dashboard.js and make the following changes:
//.. other codeconst [currentMenuItemId, setCurrentMenuItemId] = useState("");//... inside handleAddEditFormSubmit add this else-ifelse if (addEditFormType === "Edit") {FirestoreService.UpateMenuItem(currentMenuItemId, itemName.value, itemCategory.value, itemPrice.value).then(() => {alert(`${itemName.value} is successfully updated.`);setCurrentMenuItemId("");setCurrentMenuItem({ "itemName": '', "itemCategory": '', "itemPrice": 0 })handleModalClose();window.location.reload(false);}).catch((e) => {alert("Error occured: " + e.message);})}//...Then in <tbody... <td where you have the edit button update<Button variant='primary' onClick={() => {setCurrentMenuItemId(menuItem.doc.key.path.segments[menuItem.doc.key.path.segments.length - 1])setCurrentMenuItem({"itemName": menuItem.doc.data.value.mapValue.fields.itemName.stringValue,"itemCategory": menuItem.doc.data.value.mapValue.fields.itemCategory.stringValue,"itemPrice": menuItem.doc.data.value.mapValue.fields.itemPrice.doubleValue ? menuItem.doc.data.value.mapValue.fields.itemPrice.doubleValue : menuItem.doc.data.value.mapValue.fields.itemPrice.integerValue})setAddEditFormType("Edit");
setShowAddEditForm(true);}}>✎ Edit</Button>
We’re doing three things. One is we created a new state that’ll hold the value of the id of the selected menu item. Inside handleAddEditFormSubmit we’ll add another else if which check if the form type is edited then inside we’re making a simple call to the service we wrote to update. Since we already have menuItemId we got it in the response when we’re fetching the menu items so we’ll directly go to the UI side of the implementation in which when the edit button is clicked we’re updating currentMenuItem state as well as the new state we created just to store menuItemId which is in the last item of menuItem.doc.key.path.segments array and that is why we’re doing a -1 from the length of this array. Everything else is already set up for the edit functionality. Finally, we’re setting the setAddEditFormType(“Edit”); and right after that, we’re setting setShowAddEditForm(true); so that we can show the add/edit form.
So, let’s test it, I’m going to change the price of Cheesy Pita Bread to 4.5 currently, it’s 4:


So we have the edit functionality in place. Now the only one left is the delete functionality and let’s add its service:
function DeleteMenuItem(menuItemID) {return new Promise((resolve, reject) => {db.collection("MenuItems").doc(menuItemID).delete().then(() => {resolve()}).catch((e) => {reject(e)})})}export default { getAllMenuItems, getAllMenuCategories, AddNewMenuItem, UpateMenuItem, DeleteMenuItem }
We’ll only need the menuItemID and we will use delete the functionality provided by firestore here is to delete that particular document.
Now in Dashboard.js we need to show the confirmation popup first and then call the delete function. So, make the changes as follows:
//.. Update the delete function
const handleMenuItemDelete = () => {
setIsLoading(true);
FirestoreService.DeleteMenuItem(currentMenuItemId).then(() => {
  alert(`Deletion Successful`);
  handleModalClose();
  window.location.reload(false);
}).catch((e) => {
  alert("Error occured: " + e.message);
})
}//... In delete button in. <tbody... <td...<Button variant='danger' onClick={() => {setCurrentMenuItemId(menuItem.doc.key.path.segments[menuItem.doc.key.path.segments.length - 1]);setCurrentMenuItem({"itemName": menuItem.doc.data.value.mapValue.fields.itemName.stringValue,"itemCategory": menuItem.doc.data.value.mapValue.fields.itemCategory.stringValue,"itemPrice": menuItem.doc.data.value.mapValue.fields.itemPrice.doubleValue ? menuItem.doc.data.value.mapValue.fields.itemPrice.doubleValue : menuItem.doc.data.value.mapValue.fields.itemPrice.integerValue});setShowDeleteDialogue(true);}}>x Delete</Button>
We only have to make 2 changes for delete functionality. First, will be to call the service that we’re doing in handleMenuItemDelete. Secondly, we’re updating the states when the delete button is pressed same as for edit but we’re updating the state which will show delete dialogue (modal) which we already have in place. In delete Modal you’ve already implemented the call to the handleMenuItemDelete method. Now time test:


Let’s make a small optimization change. Update the handleModalClose in Dashboard.js and make both the states setCurrentMenuItemId and setCurrentMenuItem default add remove them from handleAddEditFormSubmit. This will put the states back to default every time a modal is closed.
const handleModalClose = () => {setShowAddEditForm(false);
setShowDeleteDialogue(false);
setAddEditFormType("Add");
setCurrentMenuItemId("");
setCurrentMenuItem({ "itemName": '', "itemCategory": '', "itemPrice": 0 })
}

So, there you have it. You have a portal now that has a public and authenticated side. You can perform CREATE, READ, UPDATE, and DELETE using ReactJS. The approach I have taken in this article might not be that secure as I have tried to keep things as basic as possible. You can enhance it have a look at the enhancements section after the Possible Errors section below. The full code is accessible here: https://github.com/ibjects/nandos-menu-reactjs-tutorial
Hosting
Now that you have. a full CRUD application, I wanted to also capture how you can deploy a web application and since we’re using firebase so I’ll do how to host a ReactJS web application to firebase hosting?. You can explore others as per your need like Netlify, Github Pages or others, etc. So, go to your firebase console and select Hosting and click on Get started


Open the terminal or command prompt and run this command:
npm install -g firebase-tools
Next, open VSCode and goto terminal ORcd into the project folder for me, it’s nandos-menu and run the following command:
firebase init


If you’re not logged in please run firebase login command first and then run the firebase init, and then:
- when it asks to select Firebase feature select, Hosting: Configure files for Firebase Hosting and (optionally) set up GitHub Action deploys
- Then select Use an existing project and select the project you have created for this tutorial.
- Then it’ll ask you to set a public directory, write build which will act as our public directory. We’re not using the public directory created for us during project creation as it’s firebase hosting so it’ll look for a build folder.
- Then for the next two questions, you have to type
N? Configure as a single-page app (rewrite all URLs to /index.html)? No
? Set up automatic builds and deploys with GitHub? No
Notice a build folder is created in your project directory. Now you’re ready o move to step 2 of setting up the Firebase hosting, but you’ve already done that so just press Next on step 2.
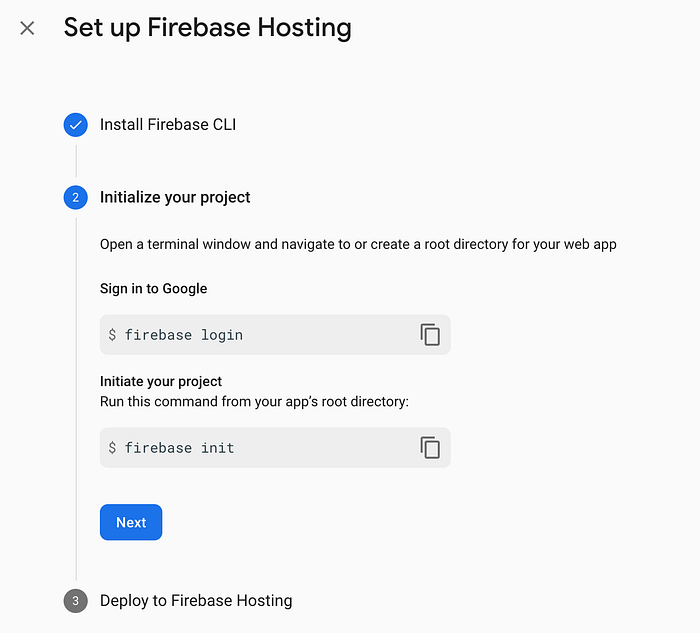


On step 3 just press Continue to console as we’ll do the Deploy in just a minute.
All the above steps are needed only once for a project. The steps below are the ones that you have to do every time there is an update that you want to push. So to build a ReactJs project run this command from the VSCode terminal:
npm run buildThe above command will create a compiled build of your project.
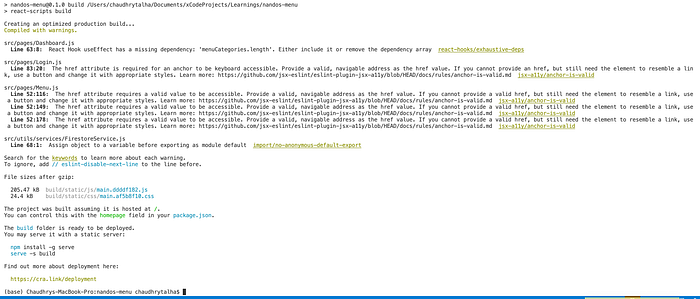
Now f you see the build folder you’ll see many files and that’s a compiled ready-to-deploy ReactJS project. So, now we’ll deploy it, so run this command:
firebase deploy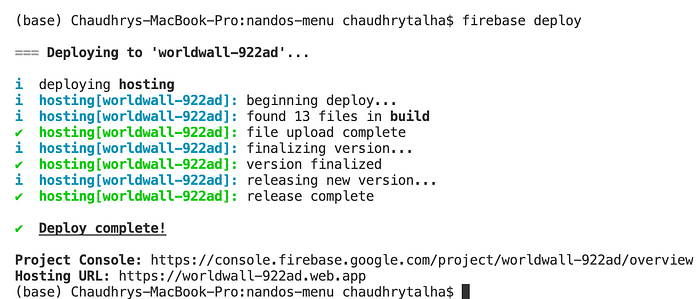
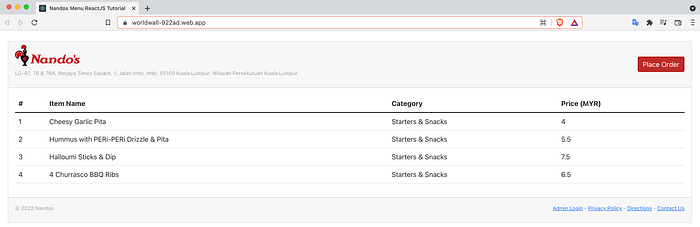
Your project is now live. Mine lives on these two domains:
You can add your custom domains as well. So, now your app is live and anyone can access it. If you use the above URLs and try to log in with the Demo credentials we made in this tutorial you’ll be able to add/edit menu items. You can also see your Hosting getting updated in the console.


If you want to change the favicon and title i.e. React App, you can do it in the index.html page inside the Public folder:

I changed the <title> in the index.html and o deploy this change I’ll only need to run these two commands from the VSCode terminal:
$ npm run build
$ firebase deploy
Now if I refresh my URL https://worldwall-922ad.web.app/ I’ll see the title updated in the window:
There you have it. But we’re not quite done yet. If you click on Admin Login you’ll end up at a 404 but. the same thing is working on localhost!
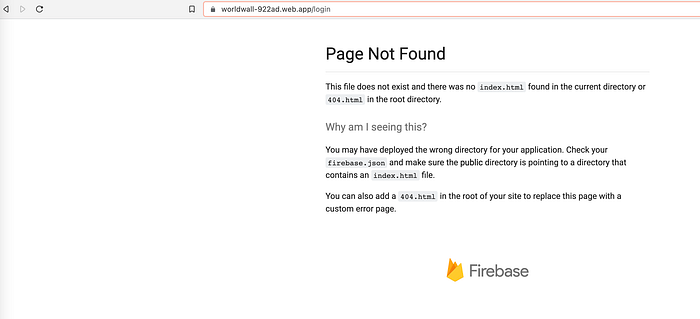
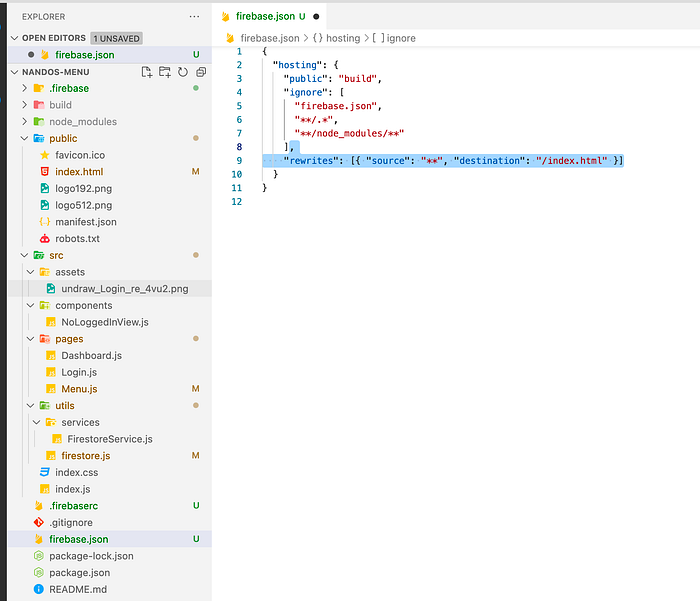
It’s because by default our app is considered a single-page app by firebase. So, we need to make some changes to firebase.json the file which should be autogenerated when we did the deployment. Open the firebasee.json file and make the following bold line (Don't forget to put a comma after the ignore array ends):
{
"hosting": {
"public": "build",
"ignore": [ "firebase.json", "**/.*", "**/node_modules/**"],
"rewrites": [{ "source": "**", "destination": "/index.html" }]
}}
Now if you build (npm run build) and deploy. (firebase deploy) again it’ll allow multiple page navigation.


That’s it! You’ve done it :D Please refer to the sections below for possible errors and enhancements you can do in this same project.
As always if you find this helpful share and press the 👏🏻 button so that others can find it too. If you see a typo feel free to highlight it or if you’re stuck drop a comment and I’ll try my best to help you.

All my tutorials are free but if you feel like supporting you can buymeacoffee.com/chaudhrytalha
Happy Coding 👨🏻💻
Possible Errors:
Here are some of the possible errors that I’ve faced or reported by people who have tried this article:
- If you’re seeing a blank screen getting rendered, make sure that the package version of
react-router-domis the same i.e.^6.2.1or is greater than version 6. - If you’re facing
Module not found: Error: Package path . is not exported from package…forfirebasepackage check the version offirebaseinpackage.jsonfile. For me it’s^9.6.1and if you’re using an older version like v8.something the import statements will be a bit different. I found these answers useful in this case: https://stackoverflow.com/questions/68929593/vue-2-export-default-imported-as-firebase-was-not-found-in-firebase-app There might be the problems like the response you’re getting, see which keys have the data you need, and parse the JSON accordingly. - Reported by Chadlphillips: If you are facing a problem with
doubleValuewhich is used at certain places likemenuItem.doc.data.value.mapValue.fields.itemPrice.doubleValueprint thedocreturned likeconsole.log(JSON.stringfy(doc))and see the type of the value being returned. Based on your scenario it might be anintegerValueor others. However, this article was written using firebasev8.xand there is a new version9.xand if you update to that you will not have to worry about handling the data like this. For more information read: https://firebase.google.com/docs/web/modular-upgrade
Enhancements:
Here are some of the things you can do to test your understanding and add any or all of these additional functionalities:
- If you have used the same example of a menu you can enhance it by adding the functionality of Updating and Deleting of Categories.
- Make the menu dynamic. Make it for anyone. It’ll be like a person can make an account and can manage their own platform.
- With the current knowledge, you can make a basic version of the Facebook web where you can let people share things on their profile and anyone with a link can see it.
- Add the functionality of order placing which will be open to the public.
Feel free to comment if you suck at anything, I’ll try my best to help.